springboot基础知识 一、Springboot简介 路线:
javase:OOP
javaweb:独立开发MVC三层架构的网站:原始
ssm:框架:简化了我们的开发流程,配置也开始较为复杂;
在此之前项目打包都是war包,程序在Tomcat中运行
spring再简化:springBoot-jar包,内嵌Tomcat;微服务架构!
服务越来越多:springCloud
1、回顾spring Spring是一个开源的java框架,主要采用了4中关键策略
1、基于POJO的轻量级和最小侵入性编程,所有东西都是bean;
2、通过IOC,依赖注入(DI)和面向接口实现松耦合;
3、基于切面(AOP)和惯例进行声明式编程;
4、通过切面和模版减少样式代码,RedisTemplate,xxxTemplate;
2、什么是springboot springboot就是一个javaweb的开发框架,和SpringMVC类似,对比其他javaweb框架的好处,官方说是简化开发,约定大于配置, you can “just run”,能迅速的开发web应用,几行代码开发一个http接口。
Spring Boot 以约定大于配置的核心思想,默认帮我们进行了很多设置,多数 Spring Boot 应用只需要很少的 Spring 配置。同时它集成了大量常用的第三方库配置(例如 Redis、MongoDB、Jpa、RabbitMQ、Quartz 等等),Spring Boot 应用中这些第三方库几乎可以零配置的开箱即用。
简单来说就是SpringBoot其实不是什么新的框架,它默认配置了很多框架的使用方式,就像maven整合了所有的jar包,spring boot整合了所有的框架 。
二、第一个SpringBoot程序 构建方式:
使用 IDEA 直接创建项目
使用Spring Initializr 的 Web页面创建项目
项目结构:
一个程序的主启动类(程序的主入口)
一个application.properties 配置文件(SpringBoot的核心配置文件)
一个测试类
一个pom.xml
项目的元数据信息:创建时输入的Project Metadata部分,即Maven项目的基本元素
parent:继承spring-boot-starter-parent的依赖管理,控制版本与打包等内容
dependencies:项目具体依赖,这里包含了spring-boot-starter-web用于实现HTTP接口(该依赖中包含了Spring MVC),使用Tomcat作为默认嵌入式容器;spring-boot-starter-test用于编写单元测试的依赖包。
build:构建配置部分。默认使用了spring-boot-maven-plugin,配合spring-boot-starter-parent就可以把Spring Boot应用打包成JAR来直接运行。
编写一个http接口,在主程序的同级目录下,新建一个controller包,创建一个HelloController类
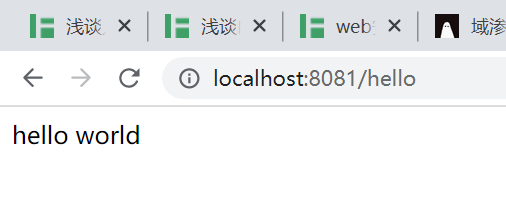
1
2
3
4
5
6
7
@RestController public class ClassController {@GetMapping("/hello") public String hello () {return "hello world" ;
可以在application.properties下配置端口
在浏览器中访问:
三、Springboot配置 1、Springboot自动装配 启动器:即Springboot的启动场景,会自动帮我们导入web环境所有的依赖。Springboot会将所有的功能场景都变成一个个启动器。
1 2 3 <dependency > <groupId > org.springframework.boot</groupId > <artifactId > spring-boot-starter-web</artifactId > </dependency >
主程序:
1 2 3 4 5 6 7 8 @SpringBootApplication public class SpringbootStudyApplication {public static void main (String[] args) {
点进@SpringBootApplication注解,发现他是一个派生注,改类注解主要实现了几个功能:
@ComponentScan:自动扫描并加载符合条件的组件或者bean , 将这个bean定义加载到IOC容器中
@SpringBootConfiguration:SpringBoot的配置类 ,标注在某个类上 , 表示这是一个SpringBoot的配置类;
@EnableAutoConfiguration :开启自动配置功能
@AutoConfigurationPackage:自动配置包,将主启动类的所在包及包下面所有子包里面的所有组件扫描到Spring容器
@Import({AutoConfigurationImportSelector.class}):自动配置导入,扫描所有具有META-INF/spring.factories的jar包
spring.factories文件下是一组一组的key=value的形式,其中一个key是EnableAutoConfiguration类的全类名,而它的value是一个xxxxAutoConfiguration的类名的列表,这些类名以逗号分隔。
总结: Springboot所有的自动配置都是在启动时扫描并加载:META-INF/spring.factories所有的配置类都在这里,但不一定生效,要判断条件是否成立,只要导入了对应的start,就有对应的启动器了,有了启动器自动装配就会生效,配置成功。
步骤: 步骤:
SpringBoot在启动的时候从类路径下的META-INF/spring.factories中获取EnableAutoConfiguration指定的值
将这些值作为自动配置类导入容器 , 自动配置类就生效 , 帮我们进行自动配置工作;
以前需要我们配置的文件,springboot帮我们配置了!
整个J2EE的整体解决方案和自动配置都在springboot-autoconfigure的jar包中;
它会给容器中导入非常多的自动配置类 (xxxAutoConfiguration)@Bean, 就是给容器中导入这个场景需要的所有组件 , 并配置好这些组件 @Configuration;
有了自动配置类 , 免去了我们手动编写配置注入功能组件等的工作;
2、Springboot配置文件 SpringBoot使用一个全局的配置文件 , 配置文件名称是固定的
application.properties
语法结构 :key=value
```xml
1 2 3 4 5 6 7 8 9 10 8081
特点:
空格不能省略
以缩进来控制层级关系,只要是左边对齐的一列数据都是同一个层级的。
属性和值的大小敏感
可以通过yaml文件赋值
1
2
3
4
5
6
7
8
9
10
11
12
13
person: name: lotus age: 3 happy: false birth: 2000 /01/01 maps: {k1: v1 ,k2: v2 }lists: - code - girl - music dog: name: 旺财 age: 1
通过注解注入到类中
1 2 3 4 5 6 7 8 9 10 11 12 13 14 15 16 17 @Component @ConfigurationProperties(prefix = "person") public class Person {private String name;private Integer age;private Boolean happy;private Date birth;private Map<String,Object> maps;private List<Object> lists;private Dog dog;
3、JSR303数据校验 JSR303数据校验是用来校验输入内容的
Springboot中可以用@validated来校验数据,如果数据异常则会统一抛出异常,方便异常中心统一处理。我们这里来写个注解让我们的name只能支持Email格式;eg:
1
2
3
4
5
6
7
@Component @ConfigurationProperties(prefix = "person") @Validated public class Person {@Email(message="邮箱格式错误") private String name;
使用数据校验,可以保证数据的正确性
1
2
3
4
5
6
7
8
9
10
11
12
13
14
15
16
17
18
19
20
21
22
23
24
25
26
27
28
@NotNull(message="名字不能为空") private String userName;@Max(value=120,message="年龄最大不能查过120") private int age;@Email(message="邮箱格式错误") private String email;@Null 验证对象是否为null @NotNull 验证对象是否不为null , 无法查检长度为0 的字符串@NotBlank 检查约束字符串是不是Null还有被Trim的长度是否大于0 ,只对字符串,且会去掉前后空格.@NotEmpty 检查约束元素是否为NULL或者是EMPTY.@AssertTrue 验证 Boolean 对象是否为 true @AssertFalse 验证 Boolean 对象是否为 false @Size(min=, max=) 验证对象(Array,Collection,Map,String)长度是否在给定的范围之内 @Length(min=, max=) string is between min and max included.@Past 验证 Date 和 Calendar 对象是否在当前时间之前 @Future 验证 Date 和 Calendar 对象是否在当前时间之后 @Pattern 验证 String 对象是否符合正则表达式的规则
4、多环境切换 profile是Spring对不同环境提供不同配置功能的支持,可以通过激活不同的环境版本,实现快速切换环境;
我们在主配置文件编写的时候,文件名可以是 application-{profile}.properties/yml , 用来指定多个环境版本;
例如:
application-test.properties 代表测试环境配置
application-dev.properties 代表开发环境配置
但是Springboot并不会直接启动这些配置文件,它默认使用application.properties主配置文件 ;
1
2
#比如在配置文件中指定使用dev环境,我们可以通过设置不同的端口号进行测试;#我们启动SpringBoot,就可以看到已经切换到dev下的配置了;
可以通过yaml配置多文档快,这样就不需要创建多个配置文件了!
1
2
3
4
5
6
7
8
9
10
11
12
13
14
15
16
17
18
19
20
21
server: port: 8081 spring: profiles: active: prod --- server: port: 8083 spring: profiles: dev --- server: port: 8084 spring: profiles: prod
5、自动配置原理 配置文件到底能写什么?怎么写?SpringBoot官方文档中有大量的配置,我们无法全部记住。
我们以HttpEncodingAutoConfiguration(Http编码自动配置) 为例解释自动配置原理;
1
2
3
4
5
6
7
8
9
10
11
12
13
14
15
16
17
18
19
20
21
22
23
24
25
26
27
28
29
30
31
32
33
34
35
36
37
38
39
40
41
42
43
44
45
@Configuration @EnableConfigurationProperties({HttpProperties.class}) @ConditionalOnWebApplication(type = Type.SERVLET) @ConditionalOnClass({CharacterEncodingFilter.class}) @ConditionalOnProperty( prefix = "spring.http.encoding", value = {"enabled"}, matchIfMissing = true ) public class HttpEncodingAutoConfiguration {private final Encoding properties;public HttpEncodingAutoConfiguration (HttpProperties properties) {this .properties = properties.getEncoding();@Bean @ConditionalOnMissingBean public CharacterEncodingFilter characterEncodingFilter () {CharacterEncodingFilter filter = new OrderedCharacterEncodingFilter ();this .properties.getCharset().name());this .properties.shouldForce(org.springframework.boot.autoconfigure.http.HttpProperties.Encoding.Type.REQUEST));this .properties.shouldForce(org.springframework.boot.autoconfigure.http.HttpProperties.Encoding.Type.RESPONSE));return filter;
根据当前不同的条件判断,决定这个配置类是否生效!
一但这个配置类生效;这个配置类就会给容器中添加各种组件;
这些组件的属性是从对应的properties类中获取的,这些类里面的每一个属性又是和配置文件绑定的;这样就可以形成我们的配置文件可以动态的修改springboot的内容。
所有在配置文件中能配置的属性都是在xxxxProperties类中封装着;
配置文件能配置什么就可以参照某个功能对应的这个属性类
通俗理解:把我们原先需要在bean中手打的属性(property)封装成了一个类,然后通过yaml文件进行自动注入,而我们也可以在application.yaml文件中对这些property进行赋值。
精髓
SpringBoot启动时会加载大量的自动配置类
我们看我们需要的功能有没有在SpringBoot默认写好的自动配置类当中
我们再来看这个自动配置类中到底配置了哪些组件;(只要我们要用的组件存在其中,我们就不需要再去手动配置了,如果不存在我们再手动配置)
给容器中自动配置类添加组件的时候,会从properties类中获取某些属性,我们只需要在配置文件中指定这些属性即可;
XXXXAutoConfiguration:自动配置类:给容器添加组件,这些组件要赋值就需要绑定一个XXXXProperties类
怎么去修改这些属性呢:说白了就是SpringBoot配置,—->.yaml、.properties这些文件
四、Springboot Web开发 1、Web开发静态资源处理 写请求非常简单,那我们要引入我们前端资源,我们项目中有许多的静态资源,比如css,js等文件,这个SpringBoot怎么处理呢?
如果我们是一个web应用,我们的main下会有一个webapp,我们以前都是将所有的页面导在这里面的,但是现在pom呢,打包方式是为jar的方式,那么这种方式SpringBoot能不能来给我们写页面呢?当然是可以的,但是SpringBoot对于静态资源放置的位置,是有规定的!
SpringBoot中,SpringMVC的web配置都在 WebMvcAutoConfiguration 这个配置类里面,该类中有很多方法,其中addResourceHandlers 添加资源处理
1
2
3
4
5
6
7
8
9
10
11
12
13
14
15
16
17
18
19
20
21
22
23
24
@Override public void addResourceHandlers (ResourceHandlerRegistry registry) {if (!this .resourceProperties.isAddMappings()) {"Default resource handling disabled" );return ;Duration cachePeriod = this .resourceProperties.getCache().getPeriod();CacheControl cacheControl = this .resourceProperties.getCache().getCachecontrol().toHttpCacheControl();if (!registry.hasMappingForPattern("/webjars/**" )) {"/webjars/**" )"classpath:/META-INF/resources/webjars/" )String staticPathPattern = this .mvcProperties.getStaticPathPattern();if (!registry.hasMappingForPattern(staticPathPattern)) {this .resourceProperties.getStaticLocations()))
我们也可以自己通过配置文件来指定一下,哪些文件夹是需要我们放静态资源文件的,在application.properties中配置
1 spring.resources.static -locations=classpath :/coding/ ,classpath :/lotus/
2、Thymeleaf模板引擎 模板引擎的作用就是我们来写一个页面模板,比如有些值呢,是动态的,我们写一些表达式。而这些值,从哪来呢,就是我们在后台封装一些数据。然后把这个模板和这个数据交给我们模板引擎,模板引擎按照我们这个数据帮你把这表达式解析、填充到我们指定的位置,然后把这个数据最终生成一个我们想要的内容给我们写出去。
引入Thymeleaf引擎:
1 2 3 4 5 <dependency > <groupId > org.springframework.boot</groupId > <artifactId > spring-boot-starter-thymeleaf</artifactId > </dependency >
引入了Thymeleaf,那这个要怎么使用呢?前面介绍了Springboot自动装配原理,所以我们去看一下这个Thymeleaf的自动配置类:ThymeleafProperties
1 2 3 4 5 6 7 8 9 10 11 12 13 14 @ConfigurationProperties( prefix = "spring.thymeleaf" ) public class ThymeleafProperties {private static final Charset DEFAULT_ENCODING;public static final String DEFAULT_PREFIX = "classpath:/templates/" ;public static final String DEFAULT_SUFFIX = ".html" ;private boolean checkTemplate = true ;private boolean checkTemplateLocation = true ;private String prefix = "classpath:/templates/" ;private String suffix = ".html" ;private String mode = "HTML" ;private Charset encoding;
我们可以在其中看到默认的前缀和后缀!
只需要把我们的html页面放在类路径下的templates下,thymeleaf就可以帮我们自动渲染了。
使用thymeleaf什么都不需要配置,只需要将他放在指定的文件夹下即可!
测试:
1、编写一个TestController
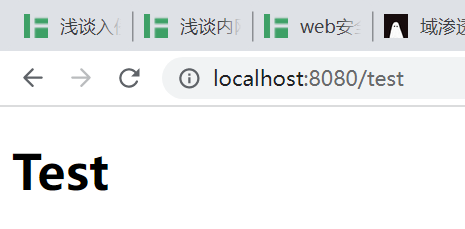
1 2 3 4 5 6 7 8 9 @Controller public class TestController {@RequestMapping("/t1") public String test1 () {return "test" ;
2、编写一个测试页面 test.html 放在 templates 目录下
1 2 3 4 5 6 7 8 9 10 <!DOCTYPE html > <html lang ="en" > <head > <meta charset ="UTF-8" > <title > Title</title > </head > <body > <h1 > test</h1 > </body > </html >
3、在浏览器中访问
Thymeleaf语法 官网:https://www.thymeleaf.org/
小试牛刀:
1、修改测试请求,增加数据传输
1 2 3 4 5 6 @RequestMapping("/test") public String test (Model model) {"msg" ,"hello,springboot" );"users" , Arrays.asList("Lotus" ,"Tim" ));return "test" ;
2、编写html也买安
1 2 3 4 5 6 7 8 9 10 11 12 13 14 15 16 <!DOCTYPE html > <html lang ="en" xmlns:th ="http://www.thymeleaf.org" > <head > <meta charset ="UTF-8" > <title > Title</title > </head > <body > <h1 th:text ="${msg}" > </h1 > <hr > <h3 th:each ="user:${users}" th:text ="${user}" > </h3 > <br > <h3 th:each ="user:${users}" > [[${user}]]</h3 > </body > </html >
3、浏览器中访问
Thymeleaf 常用语法:
1 2 3 4 5 6 7 8 9 10 11 12 13 14 15 16 17 18 19 20 21 22 23 24 25 26 27 28 29 30 31 32 33 34 35 36 37 38 39 40 41 42 43 44 45 46 47 48 49 50 51 52 53 54 55 56 57 58 59 60 61 62 63 64 Simple expressions:(表达式语法)Variable Expressions : ${...} :获取变量值;OGNL ;1 )、获取对象的属性、调用方法2 )、使用内置的基本对象:3 )、内置的一些工具对象:Selection Variable Expressions : *{...} :选择表达式:和${}在功能上是一样;Message Expressions : Link URL Expressions : @{...} :定义URL ;Fragment Expressions : ~{...} :片段引用表达式Literals (字面量)Text literals: 'one text' , 'Another one!' ,…Number literals: 0 , 34 , 3 .0 , 12 .3 ,…Boolean literals: true , false Null literal: nullLiteral tokens: one , sometext , main ,…Text operations:(文本操作)String concatenation: +Literal substitutions: |The name is ${name}|Arithmetic operations:(数学运算)Binary operators: + , - , * , / , %Minus sign (unary operator): -Boolean operations:(布尔运算)Binary operators: and , or Boolean negation (unary operator): ! , not Comparisons and equality:(比较运算)Comparators : > , < , >= , <= ( gt , lt , ge , le )Equality operators: == , != ( eq , ne )Conditional operators:条件运算(三元运算符)If -then: (if ) ? (then)If -then-else : (if ) ? (then) : (else )Default : (value) ?: (defaultvalue)Special tokens:No -Operation : _
3、SpringbootMVC自动配置原理 在进行项目编写前,我们还需要知道一个东西,就是SpringBoot对我们的SpringMVC还做了哪些配置,包括如何扩展,如何定制。
只有把这些都搞清楚了,我们在之后使用才会更加得心应手。途径一:源码分析,途径二:官方文档
1 2 3 4 5 6 7 8 9 10 11 12 13 14 15 16 17 18 19 20 21 22 23 24 25 26 27 28 29 30 31 32 33 34 35 36 37 38 39 40 41 文档:Spring MVC Auto -configurationSpring Boot provides auto-configuration for Spring MVC that works well with most applications.The auto-configuration adds the following features on top of Spring ’s defaults :Inclusion of ContentNegotiatingViewResolver and BeanNameViewResolver beans.Support for serving static resources, including support for WebJars Automatic registration of Converter , GenericConverter , and Formatter beans.Support for HttpMessageConverters (covered later in this document ).Automatic registration of MessageCodesResolver (covered later in this document ).Static index.html support.Custom Favicon support (covered later in this document ).Automatic use of a ConfigurableWebBindingInitializer bean (covered later in this document ).If you want to keep Spring Boot MVC features and you want to add additional MVC configuration @Configuration class of type WebMvcConfigurer but without @EnableWebMvc . If you wish to provide of RequestMappingHandlerMapping , RequestMappingHandlerAdapter , or ExceptionHandlerExceptionResolver , you can declare a WebMvcRegistrationsAdapter instance to provide such components.If you want to take complete control of Spring MVC , you can add your own @Configuration annotated with @EnableWebMvc .
它告诉我们SpringBoot已经帮我们自动配置好了SpringMVC,然后自动配置了哪些东西呢?
ContentNegotiatingViewResolver 内容协商视图解析器
自动配置了ViewResolver,就是我们之前学习的SpringMVC的视图解析器;
即根据方法的返回值取得视图对象(View),然后由视图对象决定如何渲染(转发,重定向)。
我们去看看这里的源码:我们找到 WebMvcAutoConfiguration , 然后搜索ContentNegotiatingViewResolver。找到如下方法!
1 2 3 4 5 6 7 8 9 10 @Bean @ConditionalOnBean(ViewResolver.class) @ConditionalOnMissingBean(name = "viewResolver", value = ContentNegotiatingViewResolver.class) public ContentNegotiatingViewResolver viewResolver (BeanFactory beanFactory) {ContentNegotiatingViewResolver resolver = new ContentNegotiatingViewResolver ();return resolver;
点进这类看看!找到对应的解析视图的代码;
1 2 3 4 5 6 7 8 9 10 11 12 13 14 15 16 @Nullable public View resolveViewName (String viewName, Locale locale) throws Exception {RequestAttributes attrs = RequestContextHolder.getRequestAttributes();instanceof ServletRequestAttributes, "No current ServletRequestAttributes" );this .getMediaTypes(((ServletRequestAttributes)attrs).getRequest());if (requestedMediaTypes != null ) {this .getCandidateViews(viewName, locale, requestedMediaTypes);View bestView = this .getBestView(candidateViews, requestedMediaTypes, attrs);if (bestView != null ) {return bestView;
我们继续点进去看,他是怎么获得候选的视图的呢?
getCandidateViews中看到他是把所有的视图解析器拿来,进行while循环,挨个解析!
1 Iterator var5 = this.viewResolvers.iterator()
所以得出结论:ContentNegotiatingViewResolver 这个视图解析器就是用来组合所有的视图解析器的
我们再去研究下他的组合逻辑,看到有个属性viewResolvers,看看它是在哪里进行赋值的
1 2 3 4 5 6 7 8 9 10 protected void initServletContext (ServletContext servletContext) {this .obtainApplicationContext(), ViewResolver.class).values();if (this .viewResolvers == null ) {this .viewResolvers = new ArrayList (matchingBeans.size());
既然它是在容器中去找视图解析器,我们是否可以猜想,我们就可以去实现一个视图解析器了呢?
我们可以自己给容器中去添加一个视图解析器;这个类就会帮我们自动的将它组合进来;我们去实现一下
1、在主程序中去写一个视图解析器
1 2 3 4 5 6 7 8 9 10 11 12 @Bean public ViewResolver myViewResolver () {return new MyViewResolver ();private static class MyViewResolver implements ViewResolver {@Override public View resolveViewName (String s, Locale locale) throws Exception {return null ;
2、怎么看我们自己写的视图解析器有没有起作用
我们给 DispatcherServlet 中的 doDispatch方法 加个断点进行调试一下,因为所有的请求都会走到这个方法中
Debug一下,可以看到我们自定义的组件就被加载到容器了
所以说,我们如果想要使用自己定制化的东西,我们只需要给容器中添加这个组件就好了!剩下的事情SpringBoot就会帮我们做了
结论:
这么多的自动配置,原理都是一样的,通过这个WebMVC的自动配置原理分析,我们要学会一种学习方式,通过源码探究,得出结论;这个结论一定是属于自己的,而且一通百通。SpringBoot的底层,大量用到了这些设计细节思想,所以,没事需要多阅读源码!
SpringBoot在自动配置很多组件的时候,先看容器中有没有用户自己配置的(如果用户自己配置@bean),如果有就用用户配置的,如果没有就用自动配置的;
如果有些组件可以存在多个,比如我们的视图解析器,就将用户配置的和自己默认的组合起来!
五、Springboot整合数据库操作 对于数据访问层,无论是 SQL(关系型数据库) 还是 NOSQL(非关系型数据库),Spring Boot 底层都是采用 Spring Data 的方式进行统一处理。
Spring Boot 底层都是采用 Spring Data 的方式进行统一处理各种数据库,Spring Data 也是 Spring 中与 Spring Boot、Spring Cloud 等齐名的知名项目。
Sping Data 官网:https://spring.io/projects/spring-data
数据库相关的启动器 :可以参考官方文档:
https://docs.spring.io/spring-boot/docs/2.2.5.RELEASE/reference/htmlsingle/#using-boot-starter
1、整合JDBC 1、在新建项目中引用JDBC API模块、MySQL Driver模块
1 2 3 4 5 6 7 8 9 <dependency > <groupId > org.springframework.boot</groupId > <artifactId > spring-boot-starter-jdbc</artifactId > </dependency > <dependency > <groupId > mysql</groupId > <artifactId > mysql-connector-java</artifactId > <scope > runtime</scope > </dependency >
2、编写yaml配置文件连接数据库
1 2 3 4 5 6 spring: datasource: username: root password: "123456" driver-class-name: com.mysql.lotus.jdbc.Driver url: jdbc:mysql://localhost:3306/mybatis?serverTimezone=GMT%2B8&useSSL=false&useUnicode=true&characterEncoding=UTF-8
3、配置完这一些东西后,我们就可以直接去使用了,因为SpringBoot已经默认帮我们进行了自动配置;去测试类测试一下
1 2 3 4 5 6 7 8 9 10 11 12 13 14 15 16 17 18 19 @SpringBootTest class Springboot03JdbcApplicationTests {@Autowired @Test void contextLoads () throws SQLException {Connection connection = dataSource.getConnection();
执行结果
结果:我们可以看到他默认给我们配置的数据源为 : class com.zaxxer.hikari.HikariDataSource , 我们并没有手动配置
我们来全局搜索一下,找到数据源的所有自动配置都在 :DataSourceAutoConfiguration文件:
1 2 3 4 5 6 7 @Import( {Hikari.class, Tomcat.class, Dbcp2.class, Generic.class, DataSourceJmxConfiguration.class} ) protected static class PooledDataSourceConfiguration {protected PooledDataSourceConfiguration () {
这里导入的类都在 DataSourceConfiguration 配置类下,可以看出 Spring Boot 2.2.5 默认使用HikariDataSource 数据源,而以前版本,如 Spring Boot 1.5 默认使用 org.apache.tomcat.jdbc.pool.DataSource 作为数据源;
HikariDataSource 号称 Java WEB 当前速度最快的数据源,相比于传统的 C3P0 、DBCP、Tomcat jdbc 等连接池更加优秀;
可以使用 spring.datasource.type 指定自定义的数据源类型,值为 要使用的连接池实现的完全限定名。
关于数据源我们并不做介绍,有了数据库连接,显然就可以 CRUD 操作数据库了。但是我们需要先了解一个对象 JdbcTemplate
JDBCTemplate
有了数据源(com.zaxxer.hikari.HikariDataSource),然后可以拿到数据库连接(java.sql.Connection),有了连接,就可以使用原生的 JDBC 语句来操作数据库;
即使不使用第三方第数据库操作框架,如 MyBatis等,Spring 本身也对原生的JDBC 做了轻量级的封装,即JdbcTemplate。
数据库操作的所有 CRUD 方法都在 JdbcTemplate 中。
Spring Boot 不仅提供了默认的数据源,同时默认已经配置好了 JdbcTemplate 放在了容器中,程序员只需自己注入即可使用
JdbcTemplate 的自动配置是依赖 org.springframework.boot.autoconfigure.jdbc 包下的 JdbcTemplateConfiguration 类
JdbcTemplate主要提供以下几类方法:
execute方法:可以用于执行任何SQL语句,一般用于执行DDL语句;
update方法及batchUpdate方法:update方法用于执行新增、修改、删除等语句;batchUpdate方法用于执行批处理相关语句;
query方法及queryForXXX方法:用于执行查询相关语句;
call方法:用于执行存储过程、函数相关语句。
编写一个Controller,注入 jdbcTemplate,编写测试方法进行访问测试:
1 2 3 4 5 6 7 8 9 10 11 12 13 14 15 16 17 18 19 20 21 22 23 24 25 26 27 28 29 30 31 32 33 34 35 36 37 38 39 40 41 42 43 44 45 46 47 48 49 50 51 52 53 54 55 56 57 58 @RestController @RequestMapping("/jdbc") public class JdbcController {@Autowired @GetMapping("/list") public List<Map<String, Object>> userList () {String sql = "select * from employee" ;return maps;@GetMapping("/add") public String addUser () {String sql = "insert into employee(last_name, email,gender,department,birth)" +" values ('lotus','915491406@qq.com',1,101,'" + new Date ().toLocaleString() +"')" ;return "addOk" ;@GetMapping("/update/{id}") public String updateUser (@PathVariable("id") int id) {String sql = "update employee set last_name=?,email=? where id=" +id;new Object [2 ];0 ] = "lotus123" ;1 ] = "91549140666@qq.com" ;return "updateOk" ;@GetMapping("/delete/{id}") public String delUser (@PathVariable("id") int id) {String sql = "delete from employee where id=?" ;return "deleteOk" ;
2、整合Druid数据源 Druid简介:Java程序很大一部分要操作数据库,为了提高性能操作数据库的时候,又不得不使用数据库连接池。Druid 是阿里巴巴开源平台上一个数据库连接池实现,结合了 C3P0、DBCP 等 DB 池的优点,同时加入了日志监控 。
Druid 可以很好的监控 DB 池连接和 SQL 的执行情况,天生就是针对监控而生 的 DB 连接池。
Github地址:https://github.com/alibaba/druid/
(1)配置数据源 1、添加上 Druid 数据源依赖
1 2 3 4 5 <dependency > <groupId > com.alibaba</groupId > <artifactId > druid</artifactId > <version > 1.1.21</version > </dependency >
2、切换数据源:之前已经说过 Spring Boot 2.0 以上默认使用 com.zaxxer.hikari.HikariDataSource 数据源,但可以 通过 spring.datasource.type 指定数据源。
1 2 3 4 5 6 7 spring: datasource: username: root password: "000000" driver-class-name: com.mysql.cj.jdbc.Driver url: jdbc:mysql://localhost:3306/mybatis?serverTimezone=GMT%2B8&useSSL=false&useUnicode=true&characterEncoding=UTF-8&allowPublicKeyRetrieval=true type: com.alibaba.druid.pool.DruidDataSource
3、数据源切换之后,在测试类中注入 DataSource,然后获取到它,输出一看便知是否成功切换;
4、切换成功,可以设置数据源连接初始化大小、最大连接数、等待时间、最小连接数 等设置项;可以查看源码
1 2 3 4 5 6 7 8 9 10 11 12 13 14 15 16 17 18 19 20 21 initialSize: 5 minIdle: 5 maxActive: 20 maxWait: 60000 timeBetweenEvictionRunsMillis: 60000 minEvictableIdleTimeMillis: 300000 validationQuery: SELECT 1 FROM DUAL testWhileIdle: true testOnBorrow: false testOnReturn: false poolPreparedStatements: true filters: stat,wall,log4j maxPoolPreparedStatementPerConnectionSize: 20 useGlobalDataSourceStat: true connectionProperties: druid.stat.mergeSql=true;druid.stat.slowSqlMillis=500
5.看到需要用到log4j,所以需要在pom中导入log4j的依赖
1 2 3 4 5 <dependency > <groupId > log4j</groupId > <artifactId > log4j</artifactId > <version > 1.2.17</version > </dependency >
6、现在需要程序员自己为 DruidDataSource 绑定全局配置文件中的参数,再添加到容器中,而不再使用 Spring Boot 的自动生成了;我们需要 自己添加 DruidDataSource 组件到容器中,并绑定属性;
1 2 3 4 5 6 7 8 9 10 11 12 13 14 15 16 @Configuration public class DruidConfig {@ConfigurationProperties(prefix = "spring.datasource") @Bean public DataSource druidDataSource () {return new DruidDataSource ();
7、在测试类中测试一下
1 2 3 4 5 6 7 8 9 10 11 12 13 14 15 16 17 18 19 20 21 22 23 @SpringBootTest class SpringbootDataJdbcApplicationTests {@Autowired @Test public void contextLoads () throws SQLException {Connection connection = dataSource.getConnection();DruidDataSource druidDataSource = (DruidDataSource) dataSource;"druidDataSource 数据源最大连接数:" + druidDataSource.getMaxActive());"druidDataSource 数据源初始化连接数:" + druidDataSource.getInitialSize());
(2)配置Druid数据源监控 继续编写DruidConfig
1 2 3 4 5 6 7 8 9 10 11 12 13 14 15 16 17 18 19 20 21 22 23 24 @Bean public ServletRegistrationBean statViewServlet () {ServletRegistrationBean bean = new ServletRegistrationBean (new StatViewServlet (), "/druid/*" );new HashMap <>();"loginUsername" , "admin" ); "loginPassword" , "123456" ); "allow" , "" );return bean;
配置完毕后,我们可以选择访问 :http://localhost:8080/druid/login.html 进入Druid Monitor页面
执行sql语句查询后,也能在该页面进行SQL监控
(3)配置 Druid web 监控 filter 过滤器 可以继续编写DruidConfig,添加过滤器
1 2 3 4 5 6 7 8 9 10 11 12 13 14 15 16 @Bean public FilterRegistrationBean webStatFilter () {FilterRegistrationBean bean = new FilterRegistrationBean ();new WebStatFilter ());new HashMap <>();"exclusions" , "*.js,*.css,/druid/*,/jdbc/*" );"/*" ));return bean;
3、整合Mybatis 官方文档:http://mybatis.org/spring-boot-starter/mybatis-spring-boot-autoconfigure/
Maven仓库地址:https://mvnrepository.com/artifact/org.mybatis.spring.boot/mybatis-spring-boot-starter/2.1.1
1、导入依赖
1 2 3 4 5 <dependency > <groupId > org.mybatis.spring.boot</groupId > <artifactId > mybatis-spring-boot-starter</artifactId > <version > 2.1.1</version > </dependency >
2、配置数据库连接信息
1 2 3 4 5 6 7 8 9 10 11 12 13 14 15 16 17 18 19 20 21 22 23 24 25 26 27 28 29 30 31 32 33 34 35 36 37 38 spring: datasource: username: root password: "123456" url: jdbc:mysql://localhost:3306/mybatis?serverTimezone=GMT%2B8&useSSL=false&useUnicode=true&characterEncoding=UTF-8&allowPublicKeyRetrieval=true driver-class-name: com.mysql.cj.jdbc.Driver type: com.alibaba.druid.pool.DruidDataSource initialSize: 5 minIdle: 5 maxActive: 20 maxWait: 60000 timeBetweenEvictionRunsMillis: 60000 minEvictableIdleTimeMillis: 300000 validationQuery: SELECT 1 FROM DUAL testWhileIdle: true testOnBorrow: false testOnReturn: false poolPreparedStatements: true filters: stat,wall,log4j maxPoolPreparedStatementPerConnectionSize: 20 useGlobalDataSourceStat: true connectionProperties: druid.stat.mergeSql=true;druid.stat.slowSqlMillis=500 mybatis: type-aliases-package: com.lotus.pojo mapper-locations: classpath:mybatis/mapper/*.xml server: port: 8080
3、创建实体类,导入 Lombok!
User.java
1 2 3 4 5 6 7 8 9 10 @Data @AllArgsConstructor @NoArgsConstructor public class User {private Integer id;private String name;private String pwd;
4、创建mapper目录以及对应的 Mapper 接口
UserMapper
1 2 3 4 5 6 7 8 9 10 11 12 13 14 15 16 @Mapper @Repository public interface UserMapper {queryUserList () ;queryUserById (int id) ;int addUser (User user) ;int updateUser (User user) ;int deleteUser (int id) ;
5、接下来该去配置mapper.xml文件了,这里建议创建在resources的目录下:
UserMapper.xml
1 2 3 4 5 6 7 8 9 10 11 12 13 14 15 16 17 18 19 20 21 22 23 24 25 26 27 <?xml version="1.0" encoding="UTF-8" ?> <!DOCTYPE mapper PUBLIC "-//mybatis.org//DTD Config 3.0//EN" "http://mybatis.org/dtd/mybatis-3-mapper.dtd" > <mapper namespace ="com.lotus.mapper.UserMapper" > <select id ="queryUserList" resultType ="User" > </select > <select id ="queryUserById" resultType ="User" > </select > <select id ="addUser" parameterType ="User" > </select > <select id ="updateUser" parameterType ="User" > </select > <select id ="deleteUser" parameterType ="int" > </select > </mapper >
6、暂时先不写service层,直接写controller调用mapper
UserController.java
1 2 3 4 5 6 7 8 9 10 11 12 13 14 15 16 17 18 19 20 21 22 23 24 25 26 27 28 29 30 31 32 33 34 35 36 37 38 39 40 41 42 43 44 package com.lotus.controller;import com.lotus.mapper.UserMapper;import com.lotus.pojo.User;import org.springframework.beans.factory.annotation.Autowired;import org.springframework.web.bind.annotation.GetMapping;import org.springframework.web.bind.annotation.RequestMapping;import org.springframework.web.bind.annotation.RestController;import java.util.List;@RestController public class UserController {@Autowired private UserMapper userMapper;@GetMapping("/queryUserList") public List<User> queryUserList () {for (User user :userList){return userList;@GetMapping("/addUser") public String addUser () {new User (5 ,"阿毛" ,"456789" ));return "ok" ;@GetMapping("/updateUser") public String updateUser () {new User (5 ,"阿毛" ,"421319" ));return "update ok" ;@GetMapping("/deleteUser") public String deleteUser () {5 );return "delete ok" ;
大功告成!
六、Springboot集成Swagger 先来了解一个概念,前后端分离:
前端 -> 前端控制层、视图层
后端 -> 后端控制层、服务层、数据访问层
前后端通过API进行交互
前后端相对独立,且松耦合
这样就会带来一个问题,就是沟通问题.前后端集成。前端或者后端无法做到“及时协商,尽早解决”,最终导致问题集中爆发
解决方案:
首先定义schema [ 计划的提纲 ],并实时跟踪最新的API,降低集成风险
早些年制定word计划文档
前后端分离:前端测试后端接口:postman
Swagger
号称世界上最流行的API框架
Restful Api 文档在线自动生成器 => API 文档 与API 定义同步更新
直接运行,在线测试API接口(其实就是controller requsetmapping)
支持多种语言 (如:Java,PHP等)
不多介绍,进入实战
1、Springboot集成Swagger 1、添加Maven依赖
1 2 3 4 5 6 7 8 9 10 11 12 <dependency > <groupId > io.springfox</groupId > <artifactId > springfox-swagger2</artifactId > <version > 2.9.2</version > </dependency > <dependency > <groupId > io.springfox</groupId > <artifactId > springfox-swagger-ui</artifactId > <version > 2.9.2</version > </dependency >
2、编写HelloController,测试确保运行成功!
3、要使用Swagger,我们需要编写一个配置类-SwaggerConfig来配置 Swagger
1 2 3 4 @Configuration @EnableSwagger2 public class SwaggerConfig {
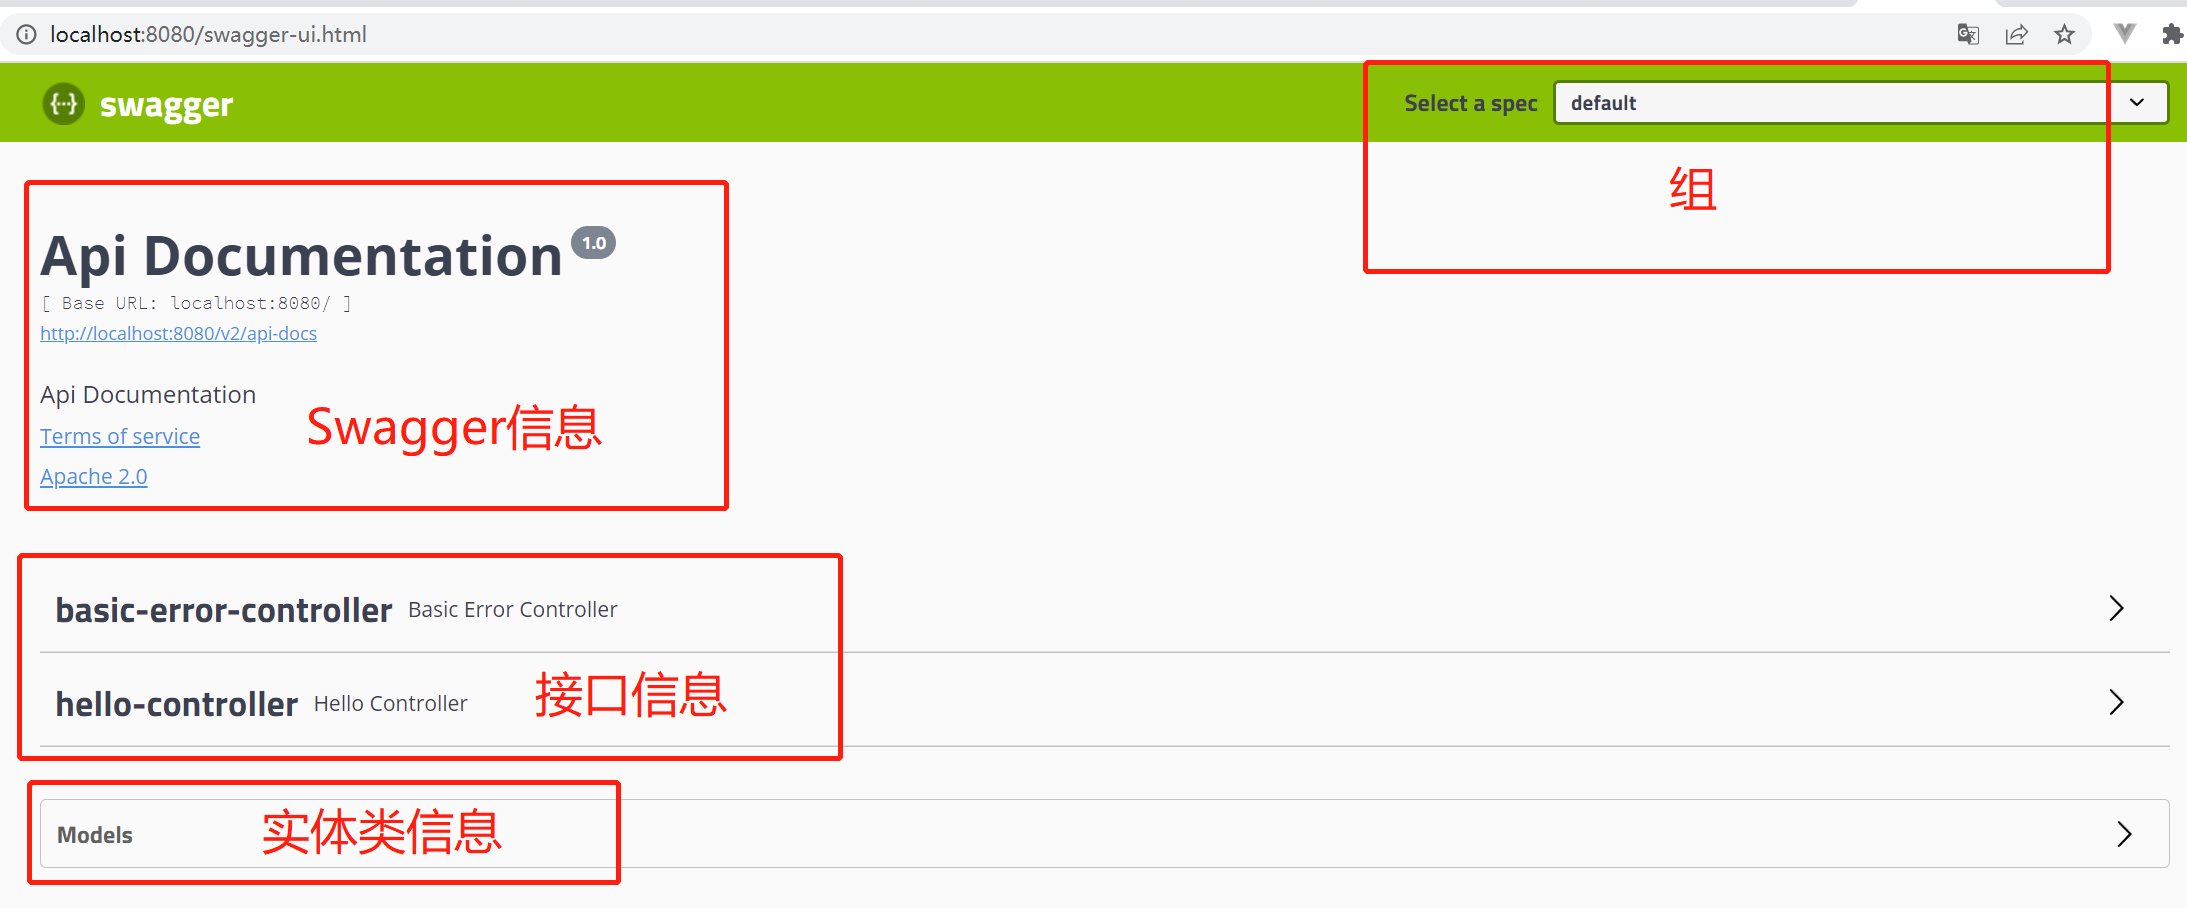
4、访问测试,http://localhost:8080/swagger-ui.html ,可以看到swagger的界面;
(1)、配置Swagger 1、Swagger实例Bean是Docket,所以通过配置Docket实例来配置Swagger,通过Docket对象接管了原来默认的配置
1 2 3 4 @Bean public Docket docket () {return new Docket (DocumentationType.SWAGGER_2).apiInfo(apiInfo());
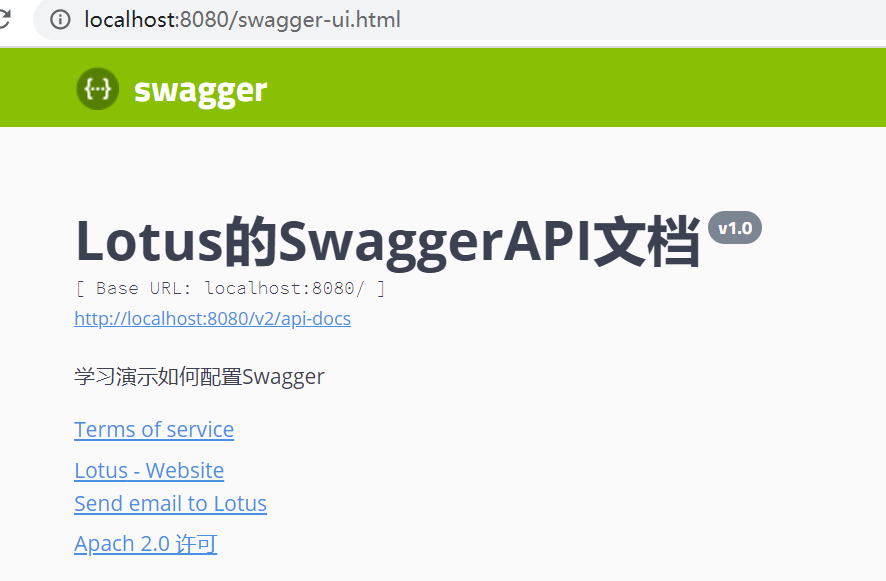
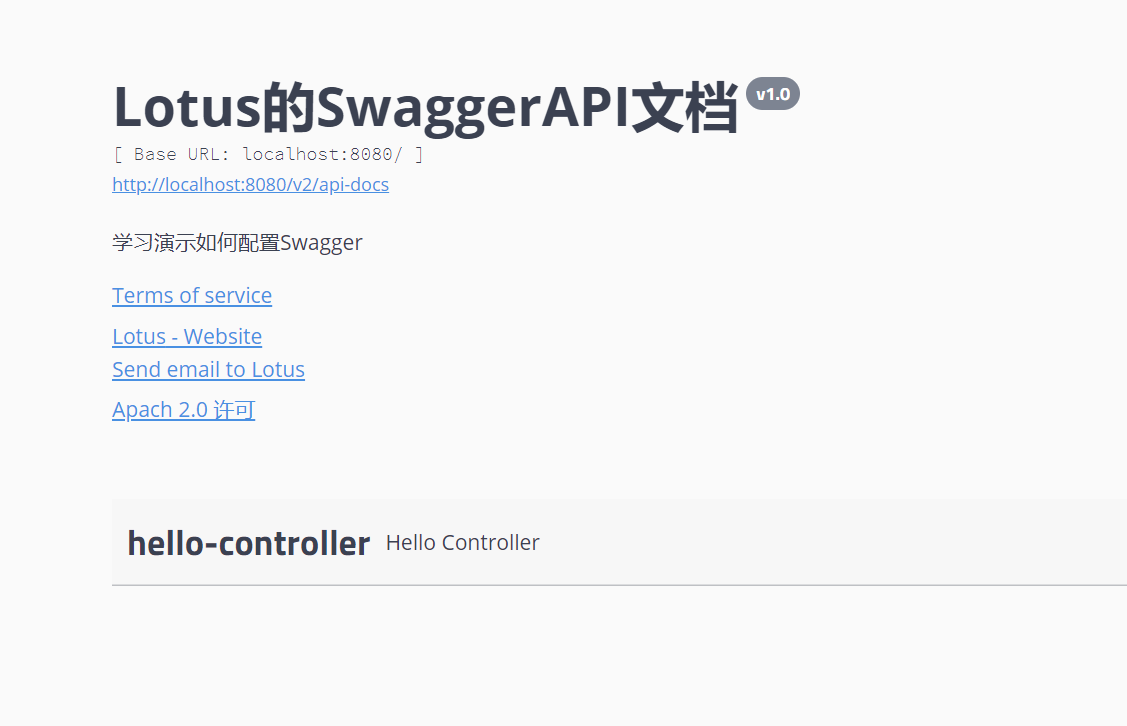
2、可以通过apiInfo()属性配置文档信息
1 2 3 4 5 6 7 8 9 10 11 12 13 14 private ApiInfo apiInfo () {Contact contact = new Contact ("Lotus" , "https://lotus6.cn" , "915491406@qq,com" );return new ApiInfo ("Lotus的SwaggerAPI文档" , "学习演示如何配置Swagger" , "v1.0" , "https://lotus6.cn" , "Apach 2.0 许可" , "许可链接" , new ArrayList <>()
效果如图
(2)、配置扫描接口 1、构建Docket时通过select()方法配置怎么扫描接口。
1 2 3 4 5 6 7 8 @Bean public Docket docket () {return new Docket (DocumentationType.SWAGGER_2)"com.lotus.swagger.controller" ))
2、重启项目测试,由于我们配置根据包的路径扫描接口,所以我们只能看到一个类
3、除了通过包路径配置扫描接口外,还可以通过配置其他方式扫描接口,这里注释一下所有的配置方式:
1 2 3 4 5 6 7 8 9 any() final Class<? extends Annotation > annotation)final Class<? extends Annotation > annotation)final String basePackage) "/lotus/**" ))
4、除此之外,我们还可以配置接口扫描过滤:
1 2 3 4 5 6 7 8 9 10 @Bean public Docket docket () {return new Docket (DocumentationType.SWAGGER_2)"com.lotus.swagger.controller" ))"/lotus/**" ))
5、这里的可选值有
1 2 3 4 any() final String pathRegex) final String antPattern)
(3)配置API分组 如果没有配置分组,默认是default。通过groupName()方法即可配置分组:
1 2 3 4 5 6 @Bean public Docket docket (Environment environment) {return new Docket (DocumentationType.SWAGGER_2).apiInfo(apiInfo())"hello" )
置多个分组只需要配置多个docket即可
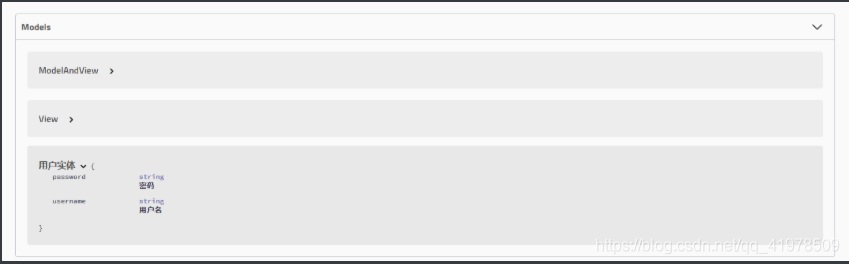
(4)实体配置 1、新建一个实体类
1 2 3 4 5 6 7 @ApiModel("用户实体") public class User {@ApiModelProperty("用户名") public String username;@ApiModelProperty("密码") public String password;
2、只要这个实体在请求接口 的返回值上(即使是泛型),都能映射到实体项中:
1 2 3 4 @RequestMapping("/getUser") public User getUser () {return new User ();
(5)配置Swagger开关 可以指定相应的环境是否开启swagger功能
1、通过enable()方法配置是否启用swagger,如果是false,swagger将不能在浏览器中访问了
1 2 3 4 5 6 7 8 9 10 11 @Bean public Docket docket () {return new Docket (DocumentationType.SWAGGER_2)false ) "com.lotus.swagger.controller" ))"/lotus/**" ))
2、如何动态配置当项目处于test、dev环境时显示swagger,处于prod时不显示?
1 2 3 4 5 6 7 8 9 10 11 12 13 14 15 16 17 @Bean public Docket docket (Environment environment) {Profiles of = Profiles.of("dev" , "test" );boolean flag = environment.acceptsProfiles(of);return new Docket (DocumentationType.SWAGGER_2)"com.lotus.swagger.controller" ))"/lotus/**" ))
如此,就能在开发环境中灵活的处理了!
七、任务 1、异步任务 所谓异步,在某些功能实现时可能要花费一定的时间,但是为了不影响客户端的体验,选择异步执行
案例:
首先创建一个service:
1 2 3 4 5 6 7 8 9 10 11 12 @Service public class AsyncService {public void hello () {try {3000 );catch (InterruptedException e) {"数据正在传输..." );
Controller:
1 2 3 4 5 6 7 8 9 10 11 12 @RestController public class AsyncController {@Autowired @RequestMapping("/async") public String async () {return "ok" ;
这样在执行/async请求时,网站会延时三秒再显示ok,后台数据也会三秒后显示数据正在传输。现在想要做到前端快速响应我们的页面,后台去慢慢的传输数据,就要用到springboot自带的功能
①想办法告诉spring我们的异步方法是异步的,所以要在方法上添加注解
1 2 3 4 5 6 7 8 9 @Async public void hello () {try {3000 );catch (InterruptedException e) {"数据正在传输..." );
②去springboot主程序中开启异步注解功能
1 2 3 4 5 6 7 8 9 @EnableAsync @SpringBootApplication public class SwaggerDemoApplication {public static void main (String[] args) {
这样,能实现sleep方法异步执行了。
2、定时任务 项目开发中经常需要执行一些定时任务,比如需要在每天凌晨的时候,分析一次前一天的日志信息,Spring为我们提供了异步执行任务调度的方式,提供了两个接口。
TaskExecutor接口
TaskScheduler接口
两个注解:
@EnableScheduling
@Scheduled
Cron表达式:
cron的表达式被用来配置CronTrigger实例。
cron的表达式是字符串,实际上是由七子表达式,描述个别细节的时间表。
这些子表达式是分开的空白,代表:
Seconds
Minutes
Hours
Day-of-Month
Month
Day-of-Week
Year (可选字段
例: “0 0 12 ? * WED” 在每星期三下午12:00 执行,个别子表达式可以包含范围;
例如,在前面的例子里(“WED”)可以替换成 “MON-FRI”, “MON, WED, FRI”甚至”MON-WED,SAT”.“*” 代表整个时间段.
Cron表达式的格式:秒 分 时 日 月 周 年(可选)。
字段名 允许的值 允许的特殊字符
“?”字符:表示不确定的值
“,”字符:指定数个值
“-”字符:指定一个值的范围
“/”字符:指定一个值的增加幅度。n/m表示从n开始,每次增加m
“L”字符:用在日表示一个月中的最后一天,用在周表示该月最后一个星期X
“W”字符:指定离给定日期最近的工作日(周一到周五)
“#”字符:表示该月第几个周X。6#3表示该月第3个周五
案例:
1、创建一个ScheduledService
1 2 3 4 5 6 7 8 9 10 11 @Service public class ScheduledService {@Scheduled(cron = "0 * * * * 0-7") public void hello () {"hello....." );
2、这里写完定时任务之后,我们需要在主程序上增加@EnableScheduling 开启定时任务功能
1 2 3 4 5 6 7 8 9 10 @EnableAsync @EnableScheduling @SpringBootApplication public class SpringbootTaskApplication {public static void main (String[] args) {
3、邮件任务 邮件发送,在我们的日常开发中,也非常的多,Springboot也帮我们做了支持
邮件发送需要引入spring-boot-start-mail
SpringBoot 自动配置MailSenderAutoConfiguration
定义MailProperties内容,配置在application.yml中
自动装配JavaMailSender
测试邮件发送
1、引入pom依赖
1 2 3 4 <dependency > <groupId > org.springframework.boot</groupId > <artifactId > spring-boot-starter-mail</artifactId > </dependency >
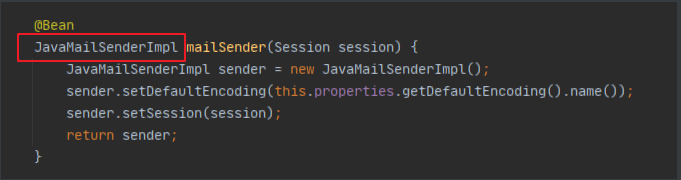
2、查看自动配置类:MailSenderAutoConfiguration
点进去,看到里面存在bean,JavaMailSenderImpl
看下配置文件
1 2 3 4 5 6 7 8 9 10 11 12 13 14 @ConfigurationProperties( prefix = "spring.mail" ) public class MailProperties {private static final Charset DEFAULT_CHARSET;private String host;private Integer port;private String username;private String password;private String protocol = "smtp" ;private Charset defaultEncoding;private Map<String, String> properties;private String jndiName;
3、配置文件:
1 2 3 4 5 spring.mail.username =你的邮箱 spring.mail.password =你的邮箱授权码 spring.mail.host =smtp.qq.com spring.mail.properties.mail.smtp.ssl.enable =true
4、Spring单元测试
1 2 3 4 5 6 7 8 9 10 11 12 13 14 15 16 17 18 @SpringBootTest class SwaggerDemoApplicationTests {@Autowired @Test public void contextLoads () {SimpleMailMessage message = new SimpleMailMessage ();"这是一个测试邮件发送标题" );"这是一个测试邮件发送内容" );"915491406@qq.com" );"915491406@qq.com" );
查看邮箱,邮件接收成功!
我们只需要使用Thymeleaf进行前后端结合即可开发自己网站邮件收发功能了!